
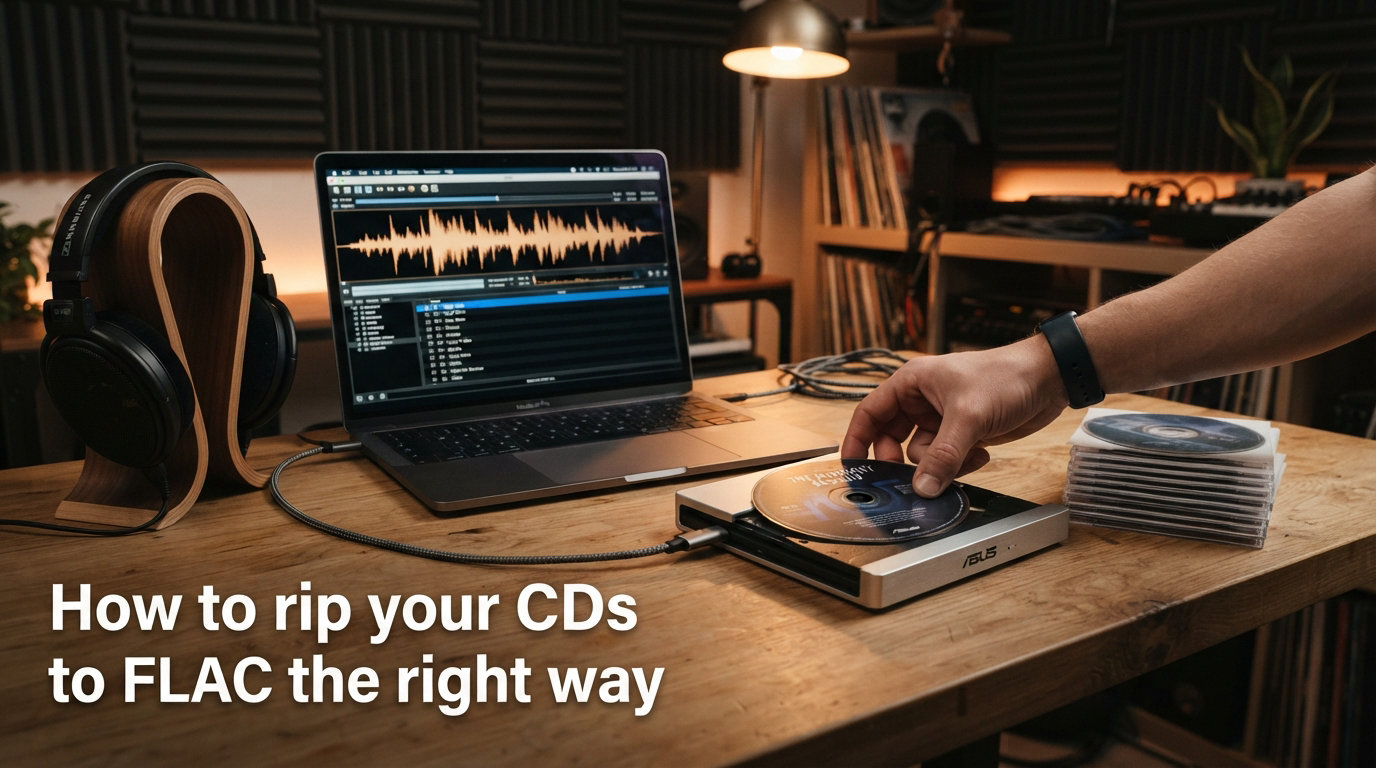
If you have spent years building a CD collection, learning how to rip CDs to FLAC the right way is the single best thing you can do to preserve it. CDs scratch, degrade, and take up shelf space, but the music on them does not have to disappear with them.
I have ripped well over a thousand discs in the last decade, including hundreds of classical box sets, and the difference between a sloppy rip and a proper one is night and day. A careless rip gives you files that skip, click, or carry errors you will only notice years later when a favorite passage glitches. A correct rip gives you a verified, bit-perfect archive that sounds exactly like the original disc.
This guide walks you through the entire process using free, community-trusted tools. You will learn which software to use, how to configure it for maximum accuracy, how to verify your rips with AccurateRip, how to handle metadata for classical recordings, and how to deal with the multi-disc sets and gapless symphonies that trip up most people.
The process takes patience on your first few discs, but once your drive and software are dialed in, it becomes quick and reliable. Let me show you the method that audiophiles and archivists rely on.
Table of Contents
Why Rip Your CDs to FLAC
FLAC stands for Free Lossless Audio Codec, and it is the format of choice for anyone who cares about sound quality. When you rip a CD to FLAC, you get a file that contains every single bit of audio data from the original disc, compressed to roughly half the size of an uncompressed WAV with zero loss of quality.
The key word is lossless. Unlike MP3 or AAC, which permanently throw away audio data to shrink file size, FLAC uses lossless compression that can be fully reversed. Play a FLAC file and you hear exactly what was on the CD. Run it through a checksum test and it matches the original bit for bit.
FLAC Versus MP3: What You Actually Lose
MP3 encoding discards sounds the algorithm predicts your ears will not miss, such as frequencies masked by louder nearby sounds. At high bitrates like 320 kbps the damage is subtle, but it is permanent and cumulative. Re-encode an MP3 and it degrades further. FLAC has none of these problems.
For popular music played on earbuds, the difference between a 320 kbps MP3 and a FLAC file is small. For classical music, jazz, acoustic recordings, and anything with quiet passages, wide dynamic range, or complex timbres, the difference is genuinely audible. Reverb tails, room ambience, and the delicate decay of a piano note all survive intact in FLAC.
I re-ripped my entire classical collection to FLAC after living with 320 kbps MP3s for a decade, and the improvement in string tone and hall ambience was immediately obvious on my main system.
Why Not Just Keep the CDs?
Physical CDs are not immortal. The reflective layer can oxidize, the polycarbonate can develop cloudiness known as CD rot, and even well-handled discs accumulate scratches over years of use. A disc that plays fine today may become unreadable in five or ten years.
Ripping your collection to FLAC creates a permanent digital master that never degrades. You can copy it, back it up, and move it to new storage for as long as you own a computer. The original CD becomes a reference you rarely need to touch.
Why FLAC and Not WAV or ALAC
WAV is uncompressed and lossless, but the files are large and the metadata support is inconsistent across players. ALAC, Apple’s lossless format, works well inside the Apple ecosystem but has less universal support outside it. FLAC offers the best balance of compression, metadata support, and compatibility across Windows, Mac, Linux, dedicated music servers, and portable players.
What You Need Before You Start
You need three things to rip CDs to FLAC properly: a suitable optical drive, ripping software, and enough storage space. None of these need to be expensive, but the quality of each one affects your results.
Your CD Drive Matters More Than You Think
Not all optical drives rip discs equally well. Cheap drives use a burst read mode that grabs data fast but does not verify accuracy, which means errors slip through unnoticed on scratched or dirty discs. Better drives support accurate streaming and can re-read damaged sectors multiple times to recover data that lesser drives would simply skip.
In my experience, internal desktop drives and external drives based on desktop mechanisms generally outperform slim laptop-style drives for error recovery. If you plan to rip hundreds of discs, investing in a decent external USB drive pays off in fewer failed rips and less frustration.
You do not need an exotic audiophile drive. A standard name-brand drive from Pioneer, Asus, or LG, kept clean and in good condition, handles the vast majority of discs without issue.
Storage Space Planning
A typical ripped album in FLAC takes up roughly 250 to 350 MB, depending on length and the complexity of the audio. A 50-disc collection fits comfortably on a 16 GB USB stick. A serious collection of 500 discs needs around 150 GB.
Plan for more space than you think you need, because once you start ripping you will probably keep going. A 1 TB drive gives you room for around 3,000 albums plus backups.
Set Aside Time
A clean, well-pressed disc rips in about 3 to 7 minutes in secure mode. A scratched disc with error recovery can take 15 to 30 minutes. Budget your time accordingly and rip in batches rather than trying to marathon your entire collection in a weekend.
Choosing the Right Ripping Software
The software you choose determines how accurate your rips are, how much manual configuration you need, and how smoothly the whole process runs. Here are the four tools worth your attention, with honest notes on where each one shines.
Exact Audio Copy (EAC) – Windows, Free
EAC is the gold standard for accurate CD ripping on Windows, and it is completely free. It uses a secure ripping mode that reads every sector multiple times, cross-checks the results, and re-reads any sector that does not match until it is confident the data is correct. This is the tool audiophile forums recommend above all others.
The trade-off is that EAC is not plug-and-play. The interface looks dated, the settings are extensive, and getting it properly configured takes some patience on your first run. Once configured, it is reliable and produces detailed log files that prove the accuracy of each rip.
dBpoweramp – Windows and Mac, Paid
dBpoweramp is the premium alternative to EAC, and many people find it worth the cost for its cleaner interface and easier setup. It includes AccurateRip integration, secure ripping, batch conversion, and a metadata lookup service that pulls album information and artwork automatically.
If you want accurate rips without spending an evening configuring settings, dBpoweramp is the most user-friendly path. The trial lets you test it before buying.
XLD (X Lossless Decoder) – Mac, Free
For Mac users, XLD is the equivalent of EAC. It is free, it supports secure ripping with AccurateRip verification, and it handles all the major lossless formats. Like EAC, the interface takes some getting used to, but the accuracy is excellent.
XLD is the tool I recommend to every Mac-using friend who asks about ripping their collection.
fre:ac – Windows, Mac, Linux, Free
fre:ac is an open-source ripper and converter that works across all three major operating systems. It is simpler than EAC and XLD, supports AccurateRip, and handles FLAC output natively. It is a solid choice if you want something straightforward and free without the learning curve of EAC.
It does not offer quite the same depth of secure ripping options as EAC, so for badly damaged discs you may want to fall back to a more advanced tool.
Software Comparison at a Glance
EAC: Free, Windows, most accurate, steep learning curve, detailed logs
dBpoweramp: Paid, Windows and Mac, accurate, easy setup, auto metadata
XLD: Free, Mac, accurate, capable, utilitarian interface
fre:ac: Free, cross-platform, simpler, solid for everyday ripping
A Note on Windows Media Player
Windows Media Player can rip CDs, and on newer versions of Windows it can output FLAC files, but it uses a fast burst-mode read with no secure verification and no AccurateRip integration. It will not catch errors on damaged discs, and it gives you no way to confirm your rip is accurate. It is fine for casual use, but it is not how to rip CDs to FLAC the right way.
How to Configure EAC for Accurate Rips
EAC is powerful but needs proper configuration to deliver accurate results. The good news is that you only do this setup once. Once EAC is dialed in, it remembers your settings for every disc you rip afterward.
These steps assume you are on Windows. Mac users should follow the same logical steps in XLD, where the options are similar even if the menus differ.
Step 1: Install EAC and AccurateRip
Download EAC from the official Exact Audio Copy website and install it. AccurateRip is bundled with recent EAC versions, so when you launch EAC for the first time and insert a reasonably popular CD, it will prompt you to configure AccurateRip automatically.
AccurateRip works by comparing your rips against a database of checksums submitted by other users. When your rip matches what others got from the same disc press, you have strong evidence your rip is correct. This is the single most important quality check in the entire ripping process.
Step 2: Detect Your Drive’s Read Offset
Every optical drive has a small read offset, meaning it consistently reads audio starting a few samples too early or too late compared to the true start of each track. This offset is a property of the drive hardware, not a defect, but if left uncorrected it means your rips will never be bit-perfect even if every sector reads cleanly.
EAC can detect and correct your drive’s offset automatically. During the AccurateRip setup it will ask you to insert a few specific popular discs, compare your drive’s behavior to the database, and calculate the exact offset. Once detected, EAC applies the correction to every future rip.
This step is worth getting right. A correct offset is the difference between a rip that matches AccurateRip and one that does not.
Step 3: Set Secure Ripping Mode
Open the drive options in EAC and under the Extraction Method tab, select Secure Mode. This tells EAC to read each audio sector at least twice and compare the results, re-reading any mismatches until it is confident. Secure mode is slower than burst mode, but it is what catches and corrects read errors.
Within secure mode, enable the option to use error recovery and set the re-read quality based on how much patience you have. Higher quality settings re-read more times, which is slower but more likely to recover data from damaged discs.
Step 4: Configure Gap Detection
CDs store gaps of silence between tracks, and how you handle them matters for classical recordings and live albums. In EAC’s gap detection settings, choose the detection method that works reliably with your drive, typically Method A or Method B. Accurate gap detection ensures your FLAC files start and end in the right places.
For most albums you will append gaps to the end of the previous track or the start of the next track. For gapless material like symphonies and operas, you want to handle gaps differently, which I cover later in the classical music section.
Step 5: Set FLAC as Your Output Format
Under compression settings, choose FLAC as your encoder. EAC can use an external FLAC encoder or a built-in one depending on your version. Set the compression level to 5 or 6, which gives a good balance of file size and encoding speed. Higher levels compress slightly more but take longer and yield diminishing returns.
Leave the option to create a log file enabled. The log is your proof that the rip completed accurately, and it records any errors that occurred so you know which discs to re-rip or replace.
Step 6: Configure Metadata Lookup
EAC can pull album metadata from freedb or other databases, but the quality of classical metadata from these sources is often poor. I recommend letting EAC fetch a basic starting point and then cleaning up the tags afterward in MusicBrainz Picard, which I cover in its own section.
The Ripping Process: Step by Step
Once EAC is configured, ripping a disc is straightforward. Here is the exact workflow I use for every CD.
Step 1: Clean and Inspect the Disc
Wipe the playing surface of the disc with a soft, lint-free cloth, working from the center outward in straight lines. Inspect for deep scratches, cracks, or cloudiness. A visibly damaged disc may still rip fine with secure mode, but knowing the condition upfront helps you set expectations.
Step 2: Insert the Disc and Fetch Metadata
Insert the disc and wait for EAC to read the table of contents. EAC will query its metadata source and populate the track listing, album title, artist, and year. Review this information carefully, because metadata from online databases is frequently wrong, especially for classical releases.
Check that the number of tracks matches the disc and that the track names look correct. Fix any obvious errors now, or plan to fix them in Picard later.
Step 3: Detect Gaps
Run gap detection so EAC knows the layout of silence between tracks. This takes a few seconds and ensures accurate track boundaries in your output files.
Step 4: Start the Extraction
Select all tracks and choose to extract and compress. EAC will switch into secure mode, reading each sector multiple times. On a clean disc this takes 3 to 7 minutes. On a damaged disc you will hear the drive slow down and re-read as it works through problem areas, which can stretch the time to 20 minutes or more.
Let it run. Interrupting a secure rip wastes the work already done.
Step 5: Check the AccurateRip Results
When the rip finishes, EAC displays AccurateRip results for each track. A confident result shows that your rip matched the checksums submitted by other users for the same disc press, which confirms accuracy. If a track shows no AccurateRip match, it either means the disc press is rare and not in the database, or there was a read error.
For unmatched tracks, check the log file. If the log shows zero read errors and a secure rip, the track is probably fine, just not in the database. If the log shows errors, you may need to clean the disc and try again.
Step 6: Review the Log File
The log file is your verification record. A good log shows a secure rip with no errors and ideally an AccurateRip confidence of 2 or higher, meaning at least two other people got identical results. Save these logs with your music files as proof of quality.
Tagging and Organizing with MusicBrainz Picard
Accurate rips are only half the battle. Poorly tagged files are miserable to browse, and classical music is the worst offender for bad metadata. MusicBrainz Picard is a free, open-source tagger that fixes this by looking up your files against the MusicBrainz database and writing clean, consistent tags.
Why Picard for Classical Collections
Most automatic taggers handle pop albums fine and fall apart on classical releases, where the performer, conductor, orchestra, composer, and label all matter. MusicBrainz stores structured relationships between these entities, so Picard can tag the composer separately from the artist, link movements to their parent work, and pull consistent album art.
This is the step that turns a pile of FLAC files into a properly browsable library.
Step 1: Install MusicBrainz Picard
Download Picard from the official MusicBrainz website for Windows, Mac, or Linux. The interface is a bit utilitarian, but the lookup engine underneath is excellent.
Step 2: Add Your Ripped Files
Drag your freshly ripped FLAC files into the left pane of Picard. Picard groups them into clusters by album. If you ripped multiple albums into one folder, Picard usually separates them automatically.
Step 3: Run the Lookup
Click the Cluster button to submit each album to the MusicBrainz database. Picard compares the audio fingerprints and disc IDs against its records and matches your files to the correct release. Matched albums move to the right pane with their corrected tags.
Unmatched albums appear in the left pane. For these, use the Lookup button to search manually and find the correct release by browsing the database.
Step 4: Review Before Saving
Click through matched albums and verify the track listing, artist, composer, and album art. For classical releases, check that the composer field is populated and that multi-movement works are tagged consistently. Picard shows you exactly what it will write before you commit.
Step 5: Save the Tags
Once you are satisfied, click Save to write the corrected tags into your FLAC files. Picard can also rename and move files into a folder structure based on the tags, which keeps your library organized automatically.
Classical Music and Box Set Considerations
Classical collections have specific needs that popular music does not, and no general ripping guide covers them properly. This is the section I wish I had read when I started ripping my own collection.
Handling Multi-Disc Box Sets
Box sets are the most common source of frustration when you rip a classical collection. A Beethoven symphony cycle might span five or more discs, and you want the finished library to reflect the cycle as a unified work, not five separate albums.
The approach I use is to rip each disc separately and let EAC name them with disc numbers, then use MusicBrainz Picard to unify them. Picard can tag multi-disc releases with disc number and total discs fields, so your player displays the complete set in order with the correct disc breaks.
Rip each disc to its own folder first. This keeps the extraction logs separate and makes it easier to spot if one disc has read errors. After tagging, you can consolidate or leave them separated depending on your preference.
Gapless Playback for Symphonies and Operas
This is critical. A symphony is one continuous piece of music, and any audible click or gap between movements ruins the listening experience. Standard track-by-track ripping inserts tiny silences at track boundaries that are imperceptible in pop music but glaring in a Mahler symphony.
The solution is to either rip with cue sheets, which preserve the exact original gap structure and let gapless-capable players like foobar2000 or MPD play seamlessly, or to append each track’s gap to the start of the next track and rely on your player’s gapless playback feature.
I prefer the second approach for simplicity. Most modern players including foobar2000, VLC, Roon, and Plexamp handle gapless playback correctly when FLAC files are encoded properly. Test your player with a continuous classical recording before trusting it for your whole library.
The Composer Field and Why It Matters
For classical music, the most important tag is the composer, not the artist. You want to browse by Beethoven, Bach, or Mahler, not by whichever orchestra happened to record the disc. Set the composer tag consistently on every file, and configure your player to display and sort by composer.
MusicBrainz Picard handles this well, but you will still find releases where the composer is missing or inconsistently entered. A few minutes of cleanup per album pays off every time you browse your library.
Movements Versus Tracks
Decide on a consistent approach for naming movements within a work. Some people prefer one track per movement, others prefer grouping a symphony’s four movements into a single track. One track per movement is the standard, because it lets you jump to a specific section, but make sure your movement titles are consistent and include the tempo marking.
Compilations and Various Artist Sets
Compilation discs where each track has a different performer need the compilation flag set so your player groups them correctly. Picard handles this automatically when it identifies a release as a compilation. For mixed composer recital discs, make sure each track carries its own correct composer tag rather than a single album-wide value.
Storing and Backing Up Your FLAC Library
Your FLAC files are only as safe as your storage. A failed hard drive with no backup means months of ripping work lost. Build your library with a storage and backup strategy from the start.
File Naming Conventions
Choose a naming scheme and stick to it. A good classical scheme includes composer, work, performer, and disc number, such as Composer, Work, Performer, Disc, Track, Movement. Consistent naming makes your files browsable even outside a music player and survives metadata changes.
Let MusicBrainz Picard handle the renaming automatically based on tags. This guarantees consistency across your entire library.
Folder Structure
Most collectors organize by composer, then by work or album. Others sort by performer or label. Pick whatever matches how you think about your collection, because the folder structure is mainly for your own browsing. Your music player reads the tags, not the folders.
The 3-2-1 Backup Rule
Follow the 3-2-1 rule: keep three copies of your data, on two different types of media, with one copy offsite. For a FLAC library this usually means your main storage drive, a local backup on an external drive or NAS, and an offsite copy in cloud storage or at a second physical location.
A network attached storage device is ideal for a music library. It centralizes your collection, makes it streamable to multiple devices, and can be configured for automatic redundancy so a single drive failure does not lose anything.
Cloud backup of a large FLAC library takes significant upload time and storage cost, but it is the only real protection against theft, fire, or a catastrophic local failure. At minimum, back up your most irreplaceable discs offsite.
Troubleshooting Common Ripping Problems
Even with good software and a decent drive, you will hit problems. Here are the issues I see most often and how to fix them.
Read Errors on Scratched or Damaged Discs
Read errors are the most common problem, and secure mode handles most of them automatically by re-reading damaged sectors. If a disc produces persistent errors, clean it thoroughly with a soft cloth and a small amount of isopropyl alcohol, working from the center outward.
For deep scratches, a gentle polishing with a disc repair kit can help. Some collectors report success with car wax or plastic polish on badly scratched polycarbonate, though this carries risk of further damage. Always try multiple secure rip passes before giving up on a disc.
If a disc is truly unreadable, your best option is to find a replacement copy. Even a budget used copy of the same pressing will rip cleanly and give you the same music.
AccurateRip Shows No Match
When AccurateRip reports no match for a disc, it usually means one of three things. The disc is a rare pressing not yet in the database, the disc is damaged and produced errors, or your drive offset is misconfigured. Check the log file first.
If the log shows a clean secure rip with zero errors, the disc is almost certainly ripped correctly and just is not in the AccurateRip database yet. This is common for obscure classical labels and small-pressing releases. Your rip is still trustworthy if the secure mode caught no errors.
Metadata Not Found or Wrong
Automatic metadata lookup fails regularly on classical releases, box sets, and remasters. Do not accept wrong metadata, because it propagates through your entire library. Let Picard do a fingerprint-based lookup, and for anything still unmatched, search the MusicBrainz database manually.
Wrong album art is a related problem. A remastered release often shares artwork with the original but is a different mastering. Match on the actual release, not just the cover image, to get correct year and label information.
Clicks or Gaps in Playback
If you hear clicks between tracks on a continuous recording, your files either have embedded gaps or your player does not support gapless playback. Re-rip with correct gap handling, or switch to a gapless-capable player like foobar2000, MPD, or Roon.
Random clicks within a track usually indicate a read error that slipped through. Re-rip the affected disc in secure mode and compare the new log to the old one.
Burst Mode Versus Secure Mode Tradeoffs
If you have hundreds of pristine, never-played discs to get through, you may be tempted to use burst mode for speed. Burst mode reads each sector once with no verification, so it is fast but cannot catch or correct errors. I recommend secure mode for everything, because the time difference is modest on clean discs and the accuracy guarantee is worth it.
Reserve burst mode only for discs you have already verified are in perfect condition and that AccurateRip confirms on the first pass.
FAQs
Can you rip CDs into FLAC?
Yes, you can rip CDs into FLAC using free software like Exact Audio Copy on Windows, XLD on Mac, or fre:ac on any platform. The software reads the audio data from the disc and encodes it into a FLAC file that is a bit-perfect copy of the original CD audio.
Does Windows Media Player rip CDs to FLAC?
Windows Media Player can rip CDs to FLAC on recent versions of Windows, but it uses a fast burst read mode with no secure ripping and no AccurateRip verification. This means it cannot detect or correct read errors on damaged discs, so it is not recommended for accurate archival ripping.
How long should it take to rip a CD to FLAC?
A clean CD rips to FLAC in about 3 to 7 minutes in secure mode. A scratched or damaged disc can take 15 to 30 minutes as the software re-reads problem sectors multiple times to recover the data. Plan for faster times on good discs and slower times on anything visibly worn.
Should I rip CDs to MP3 or FLAC?
You should rip to FLAC if you care about audio quality, especially for classical, jazz, or acoustic music. FLAC is lossless, meaning it preserves every bit of the original CD audio, while MP3 permanently discards audio data to reduce file size. FLAC files are larger than MP3s but can be converted to any other format later without quality loss.
What is AccurateRip and how does it work?
AccurateRip is a free verification database that compares your ripped audio against checksums submitted by other users for the same disc. When your rip matches, it confirms the extraction is bit-perfect and correct. It is the most reliable way to prove your FLAC files are accurate copies of the original CD.
Conclusion
Learning how to rip CDs to FLAC the right way is an investment that pays off every time you play a file and hear exactly what was on the original disc. The method comes down to a few key steps: use secure ripping software like EAC, XLD, or dBpoweramp; configure AccurateRip and drive offset correction; verify every rip against the log file; and clean up your metadata in MusicBrainz Picard.
For classical collections, take the extra time to handle multi-disc sets as unified works, preserve gapless playback for symphonies and operas, and tag the composer field consistently. These details are what separate a functional library from one that is genuinely pleasant to browse and listen to.
Start with a favorite album, work through the configuration once, and the rest of your collection gets easier with every disc. Your future self, with a complete and verified digital archive, will thank you.